Build a Webapp on Streamlit and ship with a Docker image - A Beginner's Adventure
A quick project with linux, python, streamlit, git and docker.

I am Indraneel Chakraborty - a recovering Bioinformatician in love with Technology, Data Science and DevOps. Solving problems (not limited to Bioinformatics) with code-first, data-centric approaches on cloud architecture is my primary focus.
Currently, I'm working with Elucidata as a Bioinformatics Engineer, helping teams to scale up using advanced workflow management systems like Nextflow and cloud based solutions to effectively manage technological resources, thereby cutting costs and time taken in providing ML ready biomedical data. Other than these, I am also involved in development of webapps using R-Shiny (R programming) and Streamlit (Python).
Apart from my full time job, I also volunteer as an application creator at Streamlit, open source lesson maintainer at The Carpentries, technical reviewer at Packt Publications, Community member at Data Science Festival London and beta tester at Coursera.
Found my profile interesting? Lets talk!
Requirements for this project
- A machine with Linux based OS or macOS
- Python 3
- Docker
For windows users - You can proceed by installing the Windows Subsystem for Linux
Step 1 - Get a cup of coffee and some good music!
Open up your system and chillax with a cup of coffee (or any beverage you prefer) - legend has it, coffee is the best friend of a developer. Also, if this suits your practice, put on some good music too!
(Oh c'mon, developers are not always boring...)

Step 2 - Primary Setup
- Setup your local and remote git repositories. I am using this https://github.com/ineelhere/devops/tree/dockers for this blog. You will find all the codes here. Try not to pull/use this same repository and setup one of your own on GitHub or any other platform that you prefer.
- Linux users install
figletwith (https://ubunlog.com/en/figlet-banners-ascii-terminal/)sudo apt install figlet - macOS users install
figlet(https://formulae.brew.sh/formula/figlet) withbrew install figlet In your project folder, create a python3 virtual environment (https://docs.python.org/3/library/venv.html)
python3 -m venv docker-demoIf this is the first time you are creating a virtual environment, you might need to install the tool first. Should you be in trouble, use this command
sudo apt install python3.10-venv. Remember to change the python version in the command as per your machineActivate the virtual environment you just created
source docker-demo/bin/activate
Step 3 - Install the relevant python packages
We will need to install the streamlit python package now. (https://streamlit.io/)
pip3 install streamlit
Now when you install streamlit you will see that it installs other packages as well - which are it's co-dependencies. Now think of a scenario that you are reading the article in 2023 and a lot has changed already. Lets say there has been some change in the latest package that changes the whole development procedure. So in that case, the codes listed here will definitely not work!
So, how about we list all the packages installed inside this virtual environment with all specific version information?
pip3 freeze requirements.txt
This requirements.txt file will be your single point of reference to reproduce the exact same environment I have been creating now!
Step 4 - Code Code Code!!!
We are now ready to write the python code that will basically give our webapp a frontend and allow creating the figlets.
- Import the
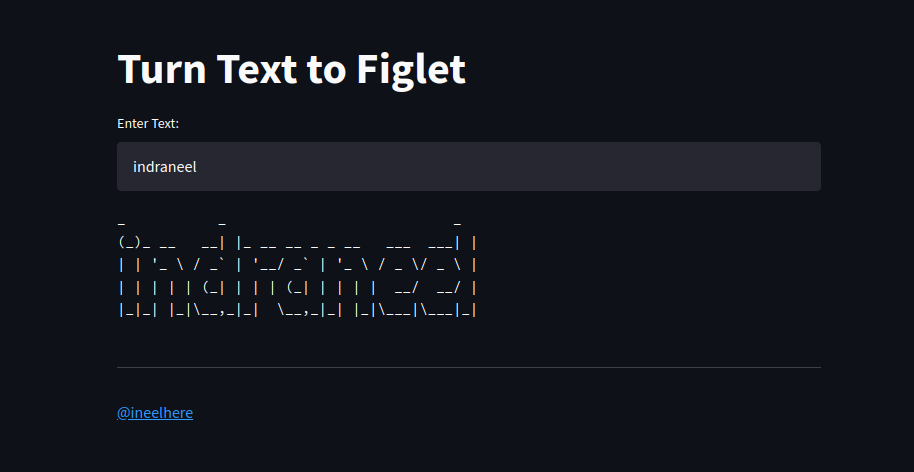
streamlitandospackagesimport streamlit as st import os - Set a title for the webapp - how about Turn Text to Figlet ?
st.title("Turn Text to Figlet") - Read input text from user
Here we read the text from the user into a variable (which is also named
text) using the text_input widget.text = st.text_input("Enter Text:") - Pass that input to the OS and run figlet
So we are using the
ospackage to communicate with our linux kernel here. Using theospackage we run the command to generate the figlet for text provided by user. The figlet hence generated is being displayed to the user on the app using the text element available fromstreamlitlibrary. We will do this only if the user has actually provided some input - which is why theifstatement has been used here.if text: os.system(f'figlet -c {text} > figlet.txt') st.text(open('figlet.txt', 'r').read())
P.S. A footer has been used using markdown just for bewutification/reference purposes. If this is something you would want to explore further, please refer to streamlit documentation
Here is the whole code (to start with...) Also available on github - https://github.com/ineelhere/devops/tree/dockers
import streamlit as st
import os
st.title("Turn Text to Figlet")
text = st.text_input("Enter Text:")
if text:
  os.system(f'figlet -c {text} > figlet.txt')
  st.text(open('figlet.txt', 'r').read())
st.markdown("""
___
[@ineelhere](https://github.com/ineelhere/)
""", unsafe_allow_html=True)
Run the webapp with the command (lets assume the code is present in the file app.py)
streamlit run app.py

Step 5 - Docker-ize the app and push to dockerhub
- If you are new to the concepts of
Dockerthen get ready to be blown away (not literally) - Docker containers allow you to ship and run your code in an isolated environment exactly configured according to the environment where you actually developed your app. (and its much more than that!)
- Now to run containers we need docker images - and to build docker images, we need to have Dockerfile, which actually has the instructions of what has to be done once the container containing your code is run.
Here is the Dockerfile for this project (you will need to change the github sources for building an image with your code)
#we will use ubuntu as the base image as available at https://hub.docker.com/_/ubuntu
FROM ubuntu:latest

# installing git and figlet
RUN apt-get update \
    && apt-get install -y git \
    && apt-get install -y figlet;

# clone the github repo and set up the env with the required packages
RUN apt-get install -y python3-pip \
    && git clone -b dockers https://github.com/ineelhere/devops.git \
    && pip3 install -r ./devops/requirements.txt;

# expose port 8501
EXPOSE 8501

# mention the entrypoint and command
ENTRYPOINT ["streamlit", "run"]
CMD ["./devops/app.py"]
Now build the image by the command
docker build -t figletapp .
Once the above step is complete, create a DockerHub account with a username and password. Lets assume your username is "ineelhere"
Then create a new repository. Lets say you named it "figletapp". So the repository name becomes ineelhere/figletapp
On your PC, using the CLI, login with the command
docker login
Now that you are logged in through your CLI, you will have to tag the local image to the remote repository and basically push the local image to remote destination. Follow these two commands -
docker tag  figletapp:latest ineelhere/figletapp:v1
docker push ineelhere/figletapp:v1
So now on your DockerHub account you will see an image has been pushed and ready to be used - just like https://hub.docker.com/repository/docker/ineelhere/figletapp
You can pull this image on your system or any destination with the command
docker pull ineelhere/figletapp:v1
And run the app with the command
docker run ineelhere/figletapp:v1
So this was a short journey to get started with an expedition involving development and shipping of your code. This might seem very overwhelming now, but trust me, you've got it! Just keep going! :)
Do read https://www.docker.com/why-docker/ and get a clearer picture.
- For complete guide to building docker images, refer to https://docs.docker.com/engine/reference/builder/
Step 6 - Enjoy!
That's all for now, folks. Enjoy coding and enjoy life - yes, coders have a life and they also enjoy it ;)